
Tired of sending your data to ChatGPT? Want to experiment with AI without paying monthly fees? Here’s how to run your own AI models right on your computer – and it’s easier than you think!
Why Should You Care?
Imagine having your own personal AI assistant that:
- ✅ Works completely offline
- ✅ Keeps all your data private (nothing leaves your computer)
- ✅ Costs you nothing after setup
- ✅ Runs whenever you want, no internet needed
Sounds good? Let’s make it happen!
🧰 Step 1: Get Ready
First things first — let’s get our “magic toolbox” ready.
Head over to Docker’s official website and install Docker Desktop for your operating system (Windows, macOS, or Linux).
What is Docker? Think of it as a shipping container for software. Just like how shipping containers keep things organized and portable, Docker keeps all your AI tools and applications neatly packaged so they don’t mess up your computer.
🧠 Step 2: Bring in the AI Models
Now that Docker is ready, it’s time to bring in the stars of the show — the AI models!
In simple terms, models are like “brains” trained to understand text, answer questions, or process language.
We’ll grab two of them:
- SmolLM2 – A small but mighty language model (like a mini ChatGPT)
- Nomic-Embed – Turns text into numbers so computers can understand relationships between words
Open your terminal (don’t panic! It’s just a text-based way to talk to your computer) and type:
docker model pull ai/smollm2
docker model run ai/smollm2
docker model pull ai/nomic-embed-text-v1.5
docker model run ai/nomic-embed-text-v1.5
🐍 Step 3: Say Hello to Python
Next, let’s make sure Python (the language most AI models speak) is working fine inside Docker.
Let´s grab a python container
docker pull python:3
And then try this fun little test:
docker run -it --rm --name my-running-script python:3 python -c "print('hello world')"
If you see “hello world” pop up — congrats, you just ran your first program inside Docker! 🎉
now let’s put the code in a py file and run it
Create a simple file called helloworld.py on your computer with this inside:
print('Hello from my file!')
Now run it with Docker:
docker run -it --rm --name myrunningscript -v ${pwd}:/usr/src/app -w /usr/src/app python:3 python helloworld.py
What’s that weird command?
-v ${pwd}:/usr/src/app= Share your current folder with the container-w /usr/src/app= Work inside that folder- The rest = Run your Python script
🔧 Step 4: Add a Little More Power
Sometimes your program needs extra tools — like “numpy,” a popular math helper for Python
Try creating hellojson.py that uses a math library:
import numpy
print('Numpy works!')
If you try to run a program that uses numpy without having it installed, it’ll fail. (Don’t panic — it’s normal.)
docker run -it --rm --name myrunningscript -v ${pwd}:/usr/src/app -w /usr/src/app python:3 python hellojson.py
Traceback (most recent call last):
File "/usr/src/app/hellojson.py", line 2, in
import numpy as np
ModuleNotFoundError: No module named 'numpy'
But we can install what we need on the fly:
docker run -it --rm --name myrunningscript -v ${pwd}:/usr/src/app -w /usr/src/app python:3 bash -c "pip install numpy && python hellojson.py"
Collecting numpy
Downloading numpy-2.3.3-cp313-cp313-manylinux_2_27_x86_64.manylinux_2_28_x86_64.whl.metadata (62 kB)
Downloading numpy-2.3.3-cp313-cp313-manylinux_2_27_x86_64.manylinux_2_28_x86_64.whl (16.6 MB)
━━━━━━━━━━━━━━━━━━━━━━━━━━━━━━━━━━━━━━━━ 16.6/16.6 MB 3.8 MB/s 0:00:04
Installing collected packages: numpy
Successfully installed numpy-2.3.3
WARNING: Running pip as the 'root' user can result in broken permissions and conflicting behaviour with the system package manager, possibly rendering your system unusable. It is recommended to use a virtual environment instead: https://pip.pypa.io/warnings/venv. Use the --root-user-action option if you know what you are doing and want to suppress this warning.
Hello World
🏗️ Step 5: Build Your Own Custom Container
Running “pip install” every time can be a pain. So instead, let’s bake numpy into our Docker container.
Think of it like making your own pre-loaded toolbox.
First Create a file called Dockerfile (no extension) with:
FROM python:3
RUN pip install numpy
Build your custom container:
docker build -t python-numpy:latest .
[+] Building 12.2s (7/7) FINISHED                                                                                                                                                                     docker:desktop-linux
 => [internal] load build definition from Dockerfile                                                                                                                                                                  0.1s
 => => transferring dockerfile: 95B                                                                                                                                                                                   0.0s
 => [internal] load metadata for docker.io/library/python:3                                                                                                                                                           0.0s
 => [internal] load .dockerignore                                                                                                                                                                                     0.0s
 => => transferring context: 2B                                                                                                                                                                                       0.0s
 => [1/3] FROM docker.io/library/python:3                                                                                                                                                                             0.2s
 => [2/3] WORKDIR /usr/src/app                                                                                                                                                                                        0.1s
 => [3/3] RUN pip install numpy                                                                                                                                                                                      11.3s
 => exporting to image                                                                                                                                                                                                0.4s
 => => exporting layers                                                                                                                                                                                               0.4s
 => => writing image sha256:ec74820e07ed696b1a81afa2d532869bee77c1d638c55d87b8a487c049bb3c90                                                                                                                          0.0s
 => => naming to docker.io/library/python-numpy:latest                                                                                                                                                                0.0s
Now your script runs instantly:

docker run -it --rm --name my-running-script -v "${pwd}:/usr/src/app" -w /usr/src/app python-numpy:latest python hellojson.py
Hello World
⚙️ Step 6: Test Your AI Models
Now that your setup is ready, it’s time for the fun part — running real AI models!
Create a file called myrequest.txt:
{
"model": "ai/smollm2",
"messages": [
{"role": "system", "content": "You are a helpful assistant.Answer the question based onlyon the following context: Frogs swim in the pond, Fish swim in the sea, Duck swim in lake"},
{"role": "user", "content": "Which animals swim?"}
]
}
You can talk to the Smollm2 model (a compact AI brain) using PowerShell:
Invoke-WebRequest -Uri "http://localhost:12434/engines/llama.cpp/v1/chat/completions" -Method POST -ContentType "application/json" -InFile "myrequest.txt"
Or, if you’re using the command prompt (cmd):
curl http://localhost:12434/engines/llama.cpp/v1/chat/completions -H "Content-Type: application/json" -d @myrequest.txt
You just chatted with your own AI! 🤖
now let’s test the embedding model
create myembed.txt
{
"input": "Lions run in the savannah",
"model": "ai/nomic-embed-text-v1.5",
"encoding_format": "float"
}
powershell
Invoke-WebRequest -Uri "http://localhost:12434/engines/llama.cpp/v1/embeddings" -Method POST -ContentType "application/json" -InFile "myembed.txt"cmd
curl http://localhost:12434/engines/llama.cpp/v1/embeddings -v -H "Content-Type: application/json" -d @myembed.txt🏁 Step 7: Put It All Together
Once everything’s in place, it’s time to run your complete script and let the magic happen:
first get all the code here (if you don’t know how to, simply dowload the zip file)
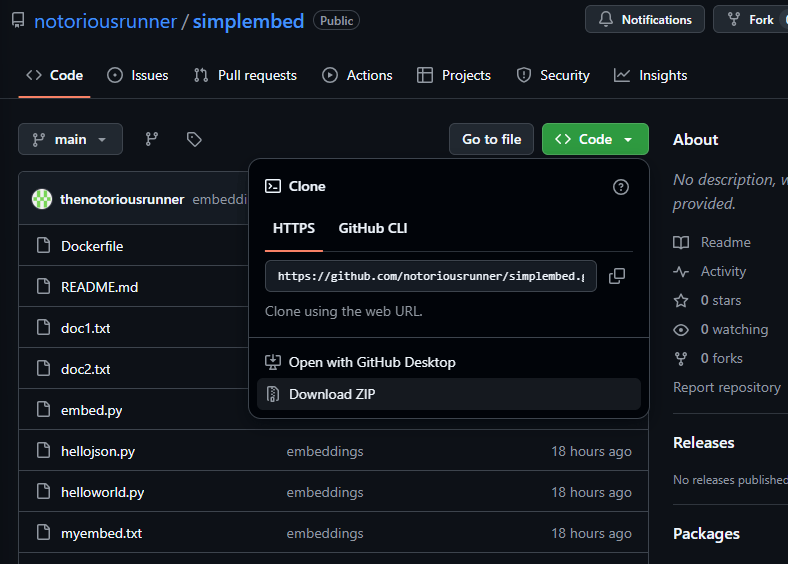
then copy embed.py, doc1.txt and doc2.txt in the folder you are using for your tests and then run the below
docker run -it --rm -v "${pwd}:/usr/src/app" -w /usr/src/app python-numpy:latest python embed.py
Then have some fun changing the documents and asking questions regarding a specific doc and see if does it correctly catch 🧪
What Can You Do Now?
What we did here might sound technical, but you just accomplished something big:
you created a working AI environment from scratch, right on your own computer, using Docker.
You didn’t just install software — you built a playground for artificial intelligence.
With your own AI running locally, you can:
- 💬 Create a private chatbot for your personal notes
- 📚 Build a document search engine that understands meaning, not just keywords
- 🔍 Analyze text without sending it to third parties
- 🎨 Experiment and learn without worrying about API costs
The Bottom Line
You now have your own AI running on your computer. No subscriptions, no data leaving your machine, no limits.
Is it as powerful as ChatGPT? Not quite – but it’s yours, it’s private, and it’s free.
What’s next? Start experimenting! The AI community is creating new models every day, and you now have the skills to try them all.
Questions? Stuck somewhere? Drop a comment below! The hardest part is getting started – you’ve already done that. Now go build something cool! 🚀

Leave a comment